Welcome to 4102165! This assignment is designed to help you get set up with your development environment and with our homework turn-in system. It also gives us a chance to get to know you a little better, too!
This is not intended to take a very long time to complete, but please get started sooner rather than later so we can fix any issues before the first real homework assignment.
Due Date: Mon, Mar 11, 2019 at 11:59am
Turn-in Link: Submission Form
- Part 1: Getting started with GitHub
- Part 2: Get the HW0 code
- Part 3: Edit the HW0 code
- Part 4: Upload to GitHub
- Part 5: Publish your GitHub Page
- Part 6: Submit
Part 1: Getting started with GitHub
We will be using GitHub Classroom for homework distribution and turn-in. This will lead you getting started with GitHub and Git.
If you are familiar with GitHub and have an account, skip to Part 2.
Q: What is Git and GitHub?
- Git is a version control system, which is a program that developers use to track and manage changes to source code over time.
- GitHub is a company that provides hosting for code that is managed by the Git version control system.
Git and GitHub are sophisticated tools for collaborative software development, used by millions of software developers worldwide. Git is incredibly powerful, but it has a somewhat notoriously steep learning curve.
Luckily for 4102165, we will only be using a very small subset of Git and GitHub’s features.
1. Sign up for a free Github account
Skip this if you already have a GitHub account.
- You will need a GitHub account to use GitHub Classroom.
- Sign up for one if you don’t have one already.
2. Get the GitHub Education Pack
Optional: This is useful in general, but not needed or beneficial for 4102165.
- This is not necessary for 4102165, but GitHub offers a bunch of free services for students, including free unlimited private GitHub repositories.
- Learn more and sign up via the Student Developer Pack.
Part 2: Get the HW0 code
In 4102165 we will be using GitHub for the following purposes:
- You will download the homework starter code from GitHub.
- You will upload your homework solution code to GitHub.
- You will publish your web page(s) to the internet via GitHub Pages.
1. Accept the HW0 assignment
- Follow this link, where HW0 is stored on GitHub Classroom.
- Click the green “Accept this assignment” button.
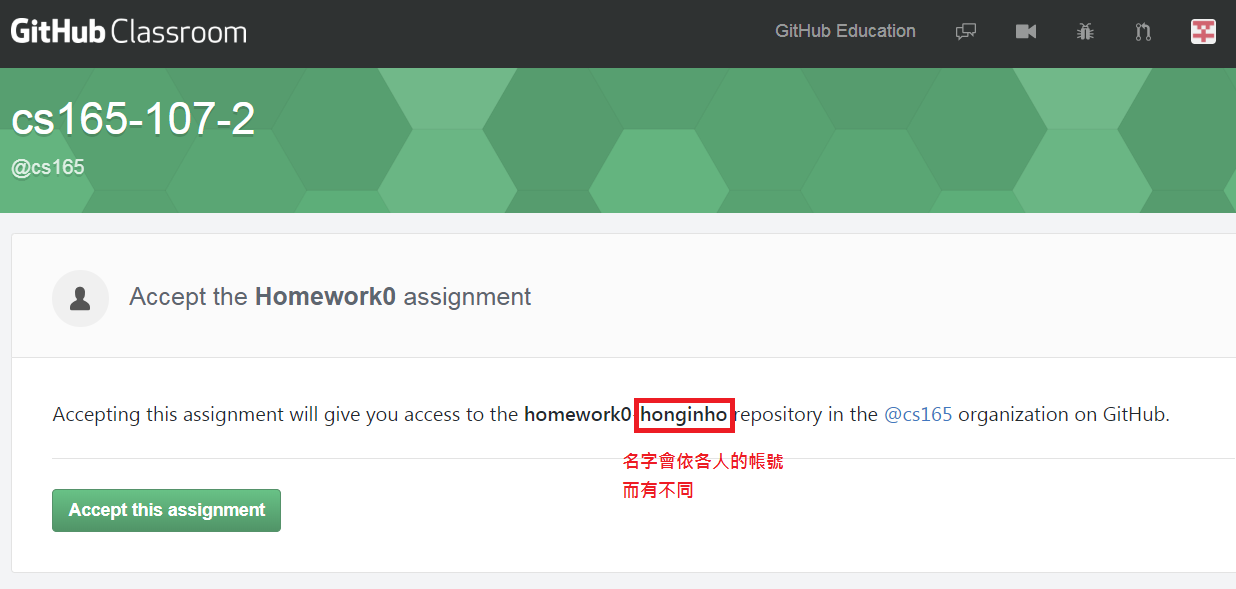
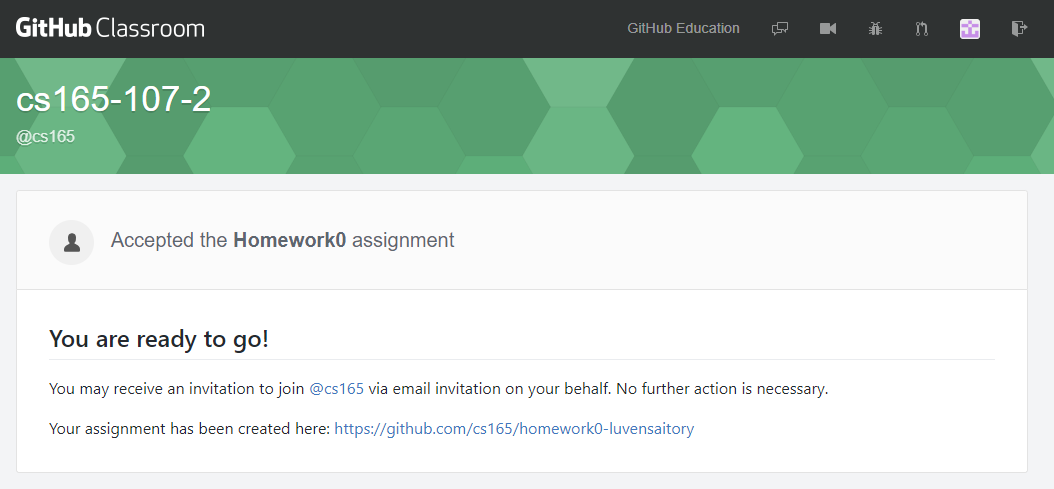
- Follow the link to your newly created assignment on the next screen.
2. Download the HW0 starter code
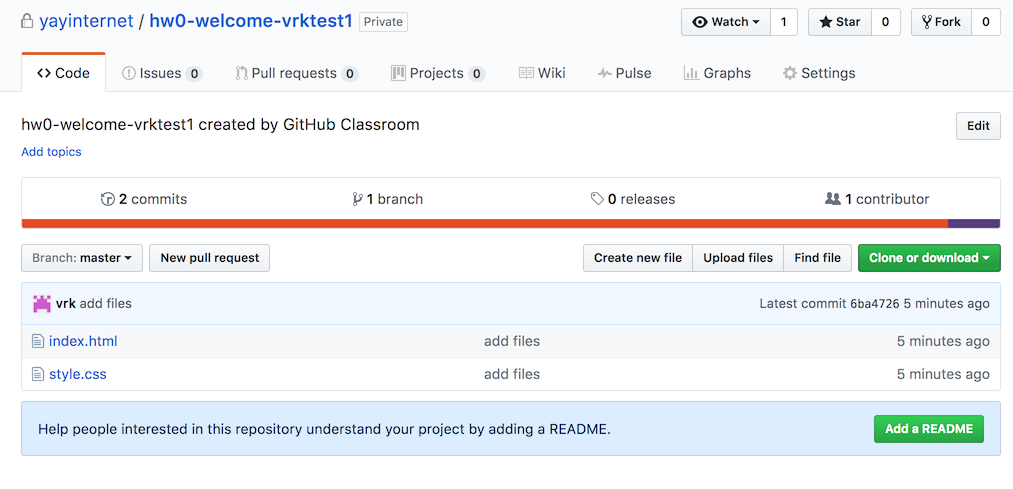
Technically, your newly created assignment is a “GitHub repository.”
- This is a private repository, meaning only you (and the course staff) can access it.
- This is basically a private online folder where you will ultimately store your finished homework files. Right now, though, it contains the starter code for the assignment.
At this point, you want to download the files in this repository.
Git-speak for people who are very familiar with Git already:
(Please ignore this box entirely if you’ve never used git before.)
- The “assignment” created for you through the GitHub Classroom UI is a private GitHub repository like any other private GitHub repo you would own.
- You can clone, push, and pull to this repository using the command-line or whatever UI you prefer.
- If you want to use git to manage your assignment (as opposed to the GitHub web UI), just clone your assignment repository and skip to Part 3.
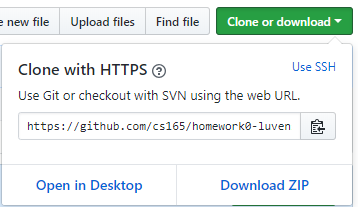
To download the starter code via the GitHub UI:
- In your homework repository (i.e. this screen), click the green “Clone or download” button.
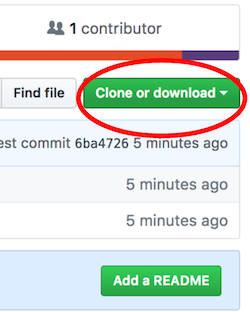
- In the menu that pops up, click “Download ZIP”
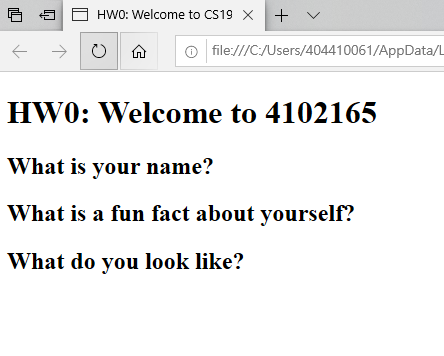
3. View the starter code in a browser
Note that Chrome is the recommended browser for the course, and your TAs will be grading your assignments using the Chrome browser. Please either install and use Chrome for development, or at least make sure to test your assignments in Chrome before submitting them.
- Unzip your downloaded zip file somewhere on your computer
- Open “index.html” in Chrome or another browser of your choosing.
- You should see something that looks like the following:
Part 3: Edit the HW0 code
1. Download and install Atom
Optional: We will be using Atom in lecture, but you may use whatever text editor you’d like.
We recommend that you use the Atom text editor for 4102165.
2. Fix the TODOs in index.html
- In Atom (or your preferred text editor), open
index.htmland fix the TODOs. - Here is a screenshot of an example “solution”:
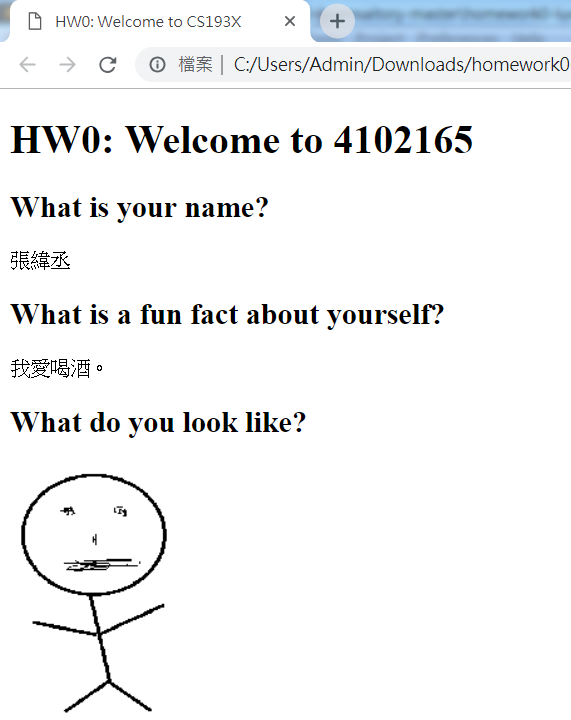
- If you’d like, you can further style, decorate, or modify your page to your liking. This is not required, however.
Part 4: Upload to GitHub
Now that you’ve completed the homework, you should upload your files back to your Homework 0 repository.
Git-speak for people who are very familiar with Git already:
(Please ignore this box entirely if you’ve never used git before.)
- If you cloned your repository via git, just commit all changes and push them to the repository on GitHub.
- You can now skip to Part 5.
- Navigate to your Homework 0 repository on GitHub (i.e. this screen).
- Click the “Upload files” button.
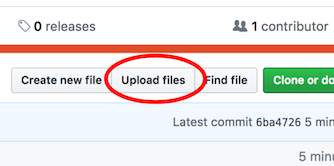
- On the next screen, select your
index.html,style.css, and your image file for upload. Your screen should now look like the following: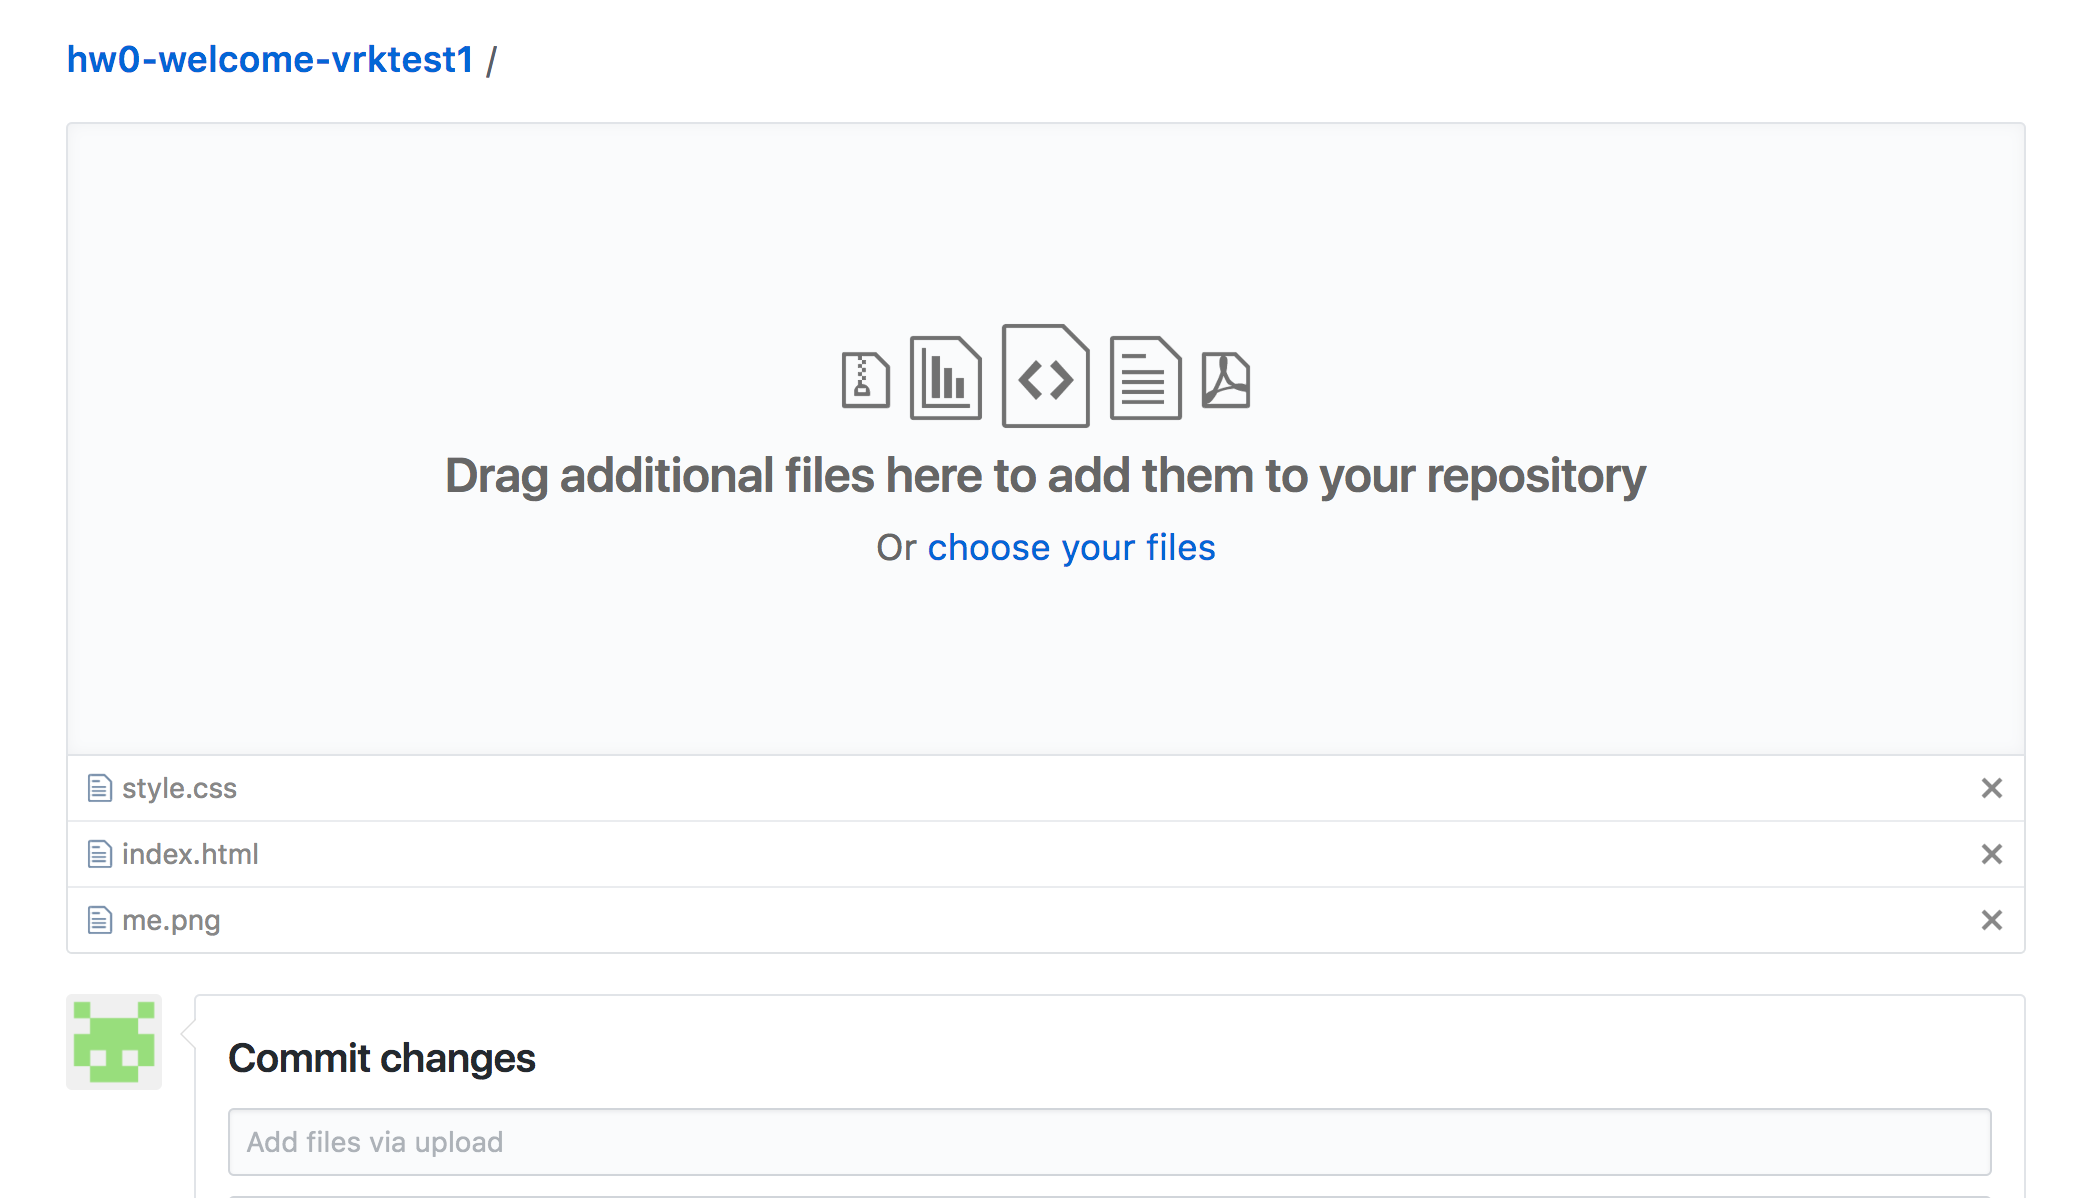
- (You actually don’t have to upload
style.cssagain if you didn’t modify it.)
- (You actually don’t have to upload
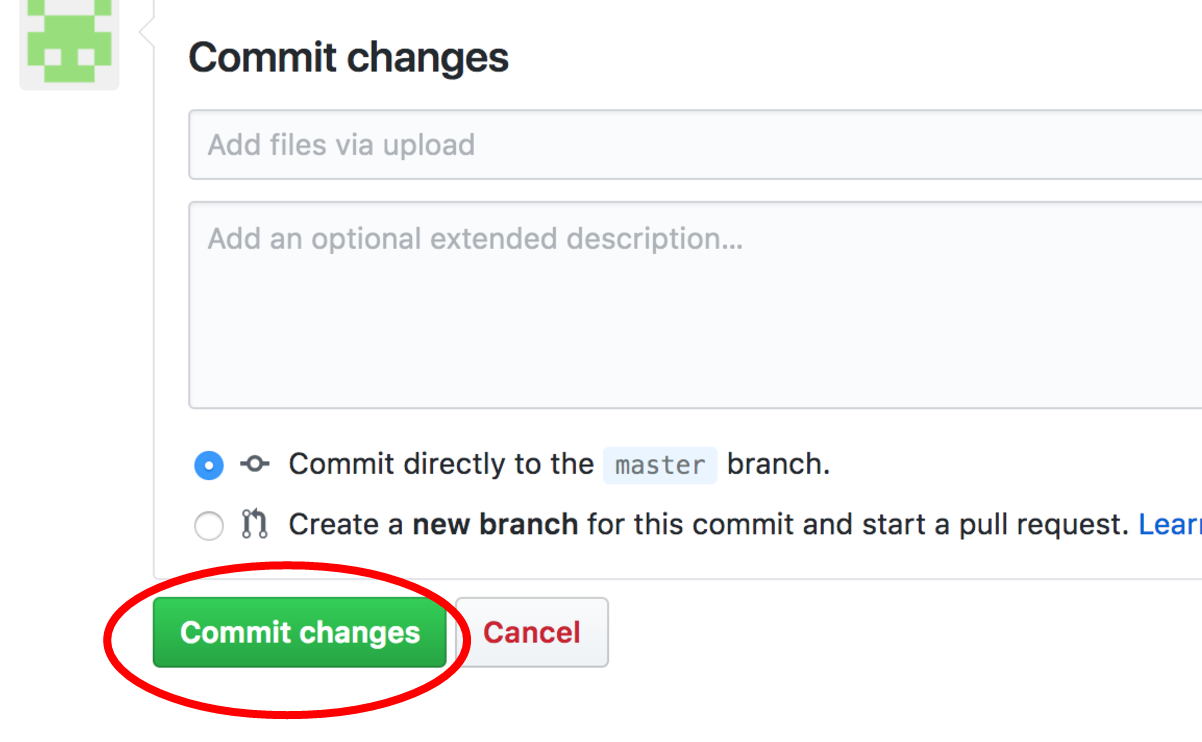
- Scroll to the bottom of the screen and click the green “Commit changes” button. You don’t need to fill out any of the form.
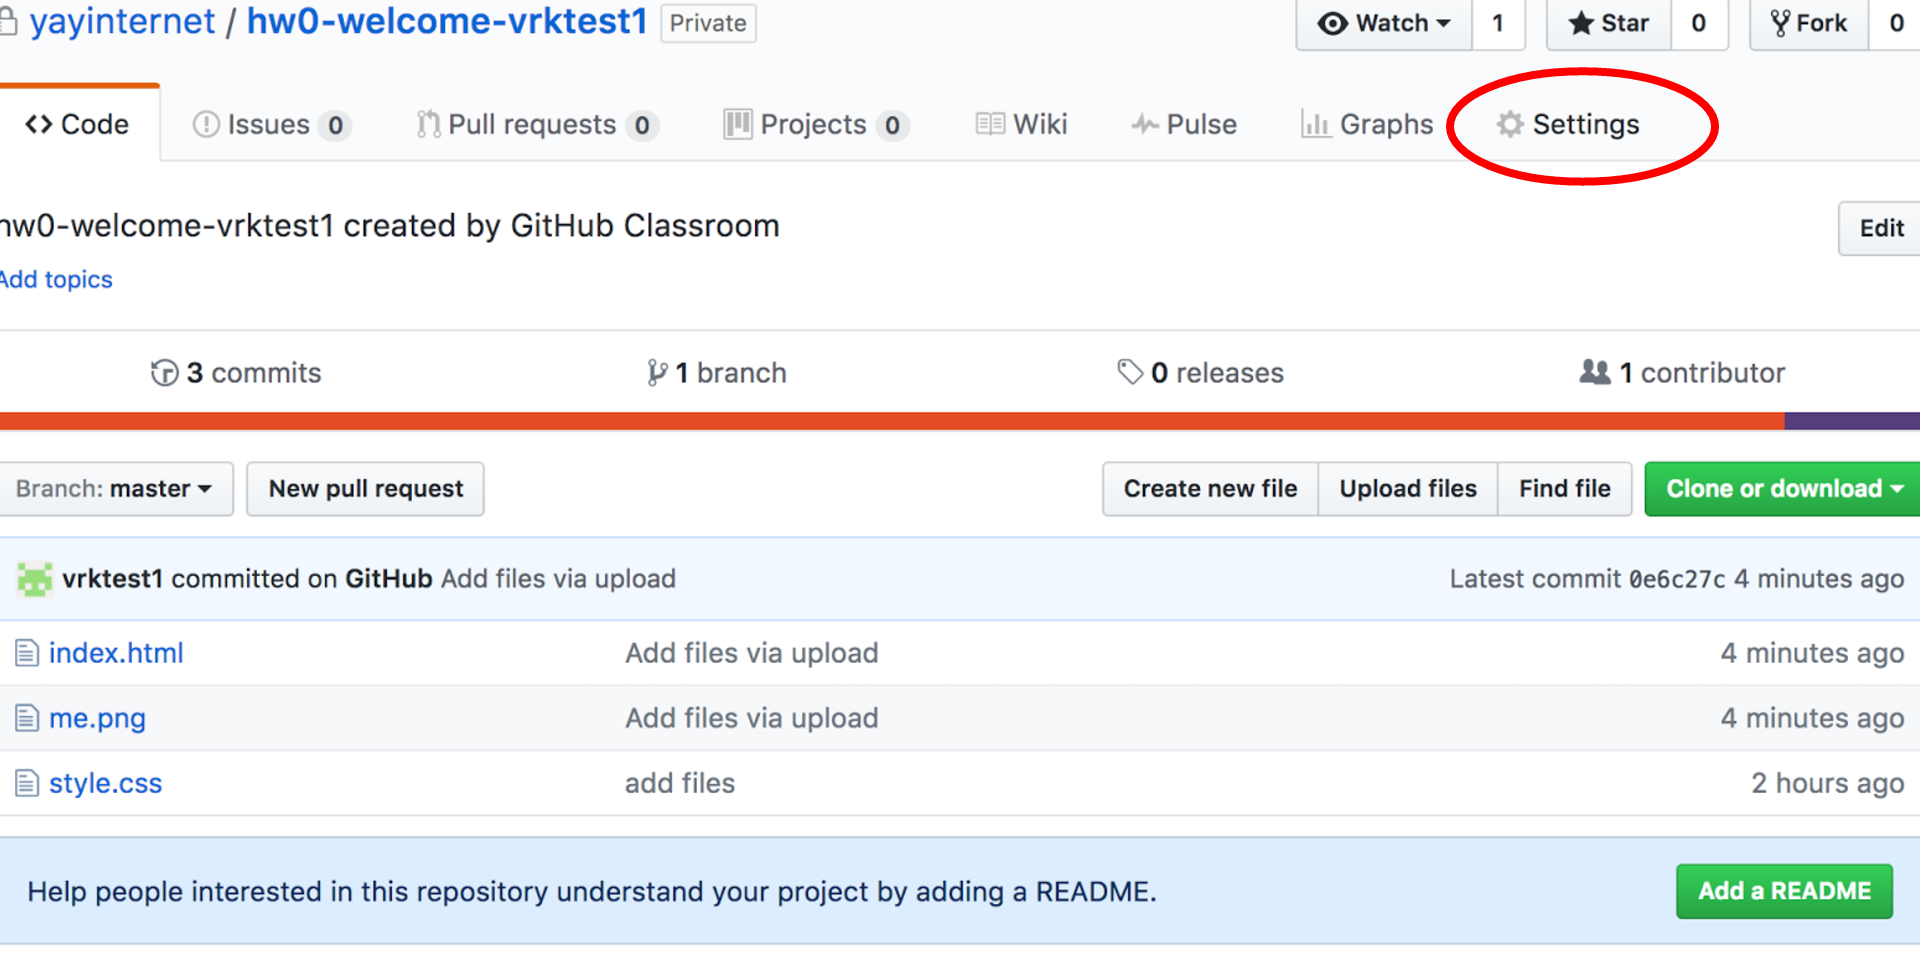
- You should be redirected to the main repository screen again. The existing files should be updated and your new files should be uploaded.
Part 5: Publish your GitHub Page
You will now publish your website as a GitHub page. This will make your website publicly accessible on the internet. (Please remember the Honor Code section of the Course Info page.)
- Navigate to your Homework 0 repository on GitHub. (You should already be on this page.)
- Click the “Settings” button.
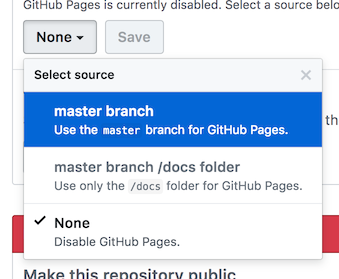
- On the Settings page, scroll down near the bottom to the “GitHub Pages” section. Under “Source”, click the button that’s currently set to “None”…
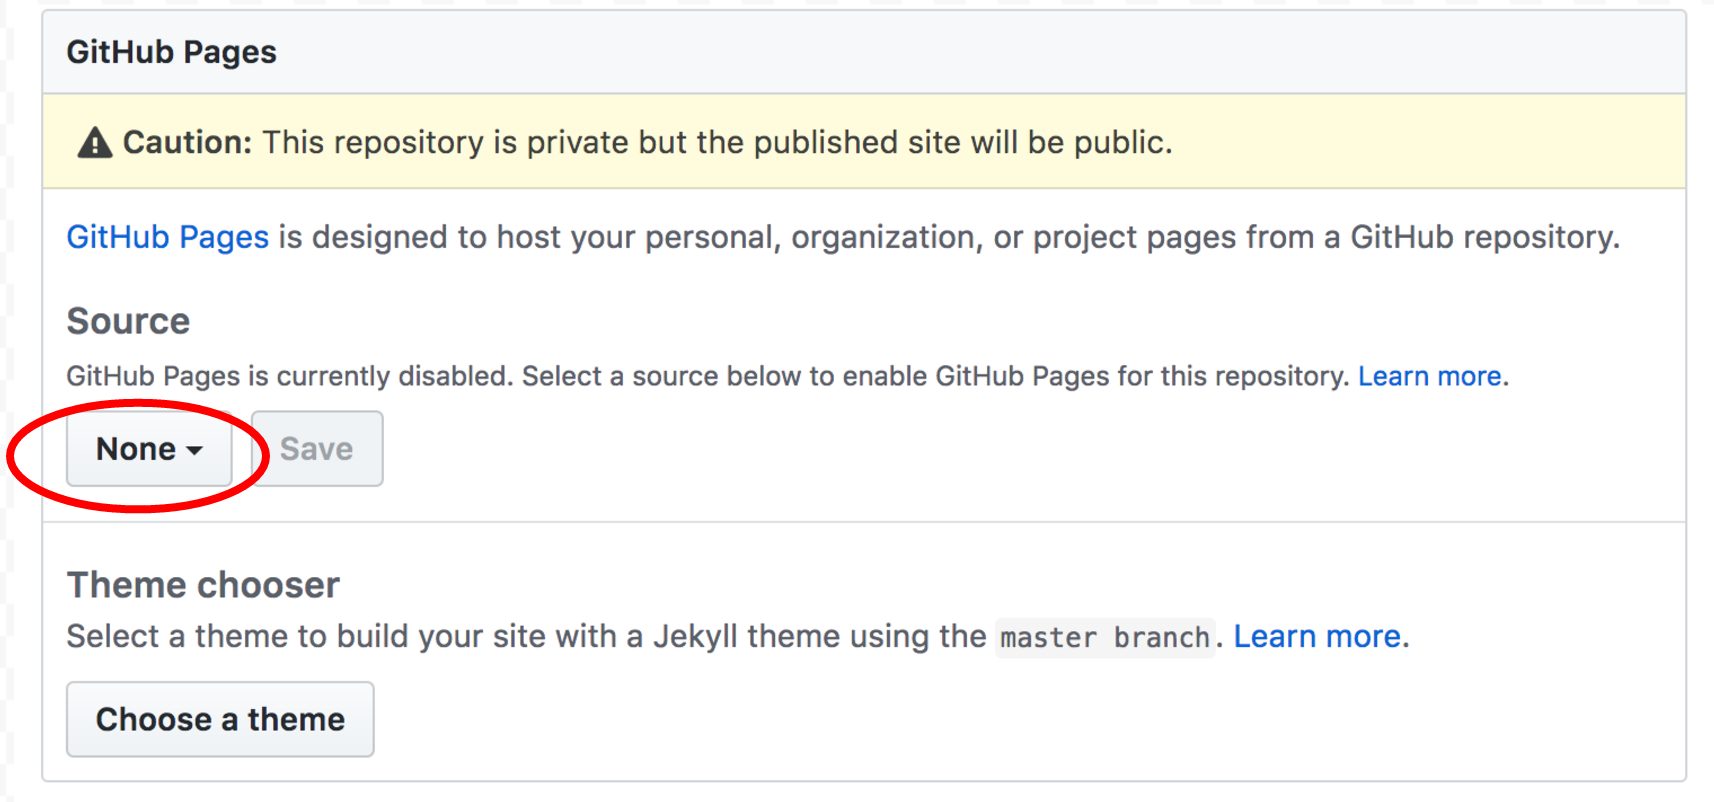
- … and change it to “master branch”:
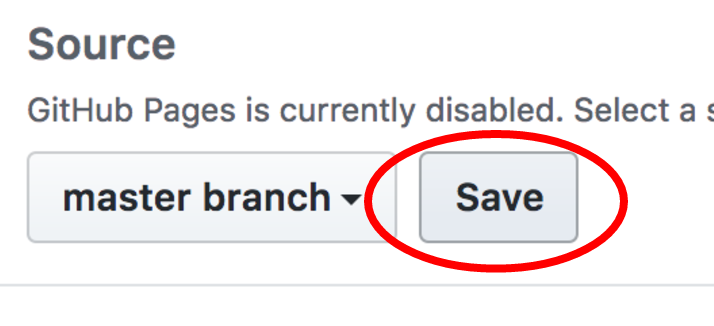
- Then click “Save”:
- The page will reload and you will be taken back to the top of the Settings screen.
- Scroll back down to the “GitHub Pages” section, and you should now see a link to your published GitHub page.
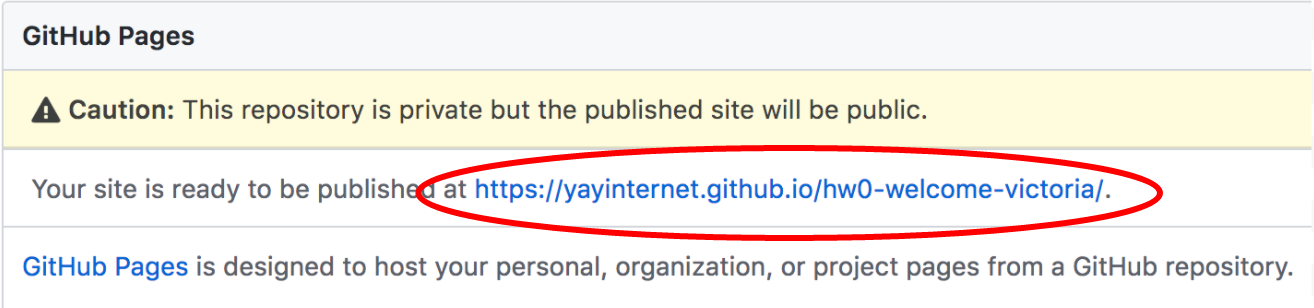
- Click your link to verify it is working as expected.
- Note that this is a publicly accessible link. You can send it to your friends if you want to show it off!
Note: You may notice that on the Settings page, there is an option to make the repository public. Please do not do this.
Part 6: Submit
Finally, turn in the link to your GitHub repository and a link to your completed web page via this form: